WhatsApp Integration
Integrating WhatsApp with FahemAI allows your custom agent to communicate directly with customers via WhatsApp, providing a seamless and efficient way to handle inquiries and automate responses. This guide will walk you through the necessary steps to connect your agent to a WhatsApp phone number, ensuring smooth and effective customer interactions.
The WhatsApp API is designed for medium and large businesses that want to use WhatsApp with multiple users. It allows businesses to broadcast messages to a wider audience and monitor the performance of agents and teams. However, the WhatsApp API does not come with an interface for sending and receiving messages. Fortunately, FahemAI solves this problem by providing a user-friendly messaging platform that allows businesses to easily register and connect to the WhatsApp API.
The WhatsApp API is not free to use and incurs fees based on the number of conversations. Learn more about WhatsApp pricing.
Before we start
- The WhatsApp phone number integrated with the agent can only be used by the agent, and can't be used on WhatsApp or WhatsApp business. If you already use the phone number with WhatsApp, you must delete your account in the app first.
How to delete WhatsApp account
- Navigate to WhatsApp or WhatsApp Business app.
- Navigate to Settings > Account.
- Select Delete my account. This may take a few minutes, but after that, the number will be available to use.
Disable two-step verification (If previously used Meta Developer)
If you previously used WhatsApp through Meta Developer for business you must disable two-step verification:
- Navigate to your Whatsapp Business Account and login.
- Choose the phone number you would like to integrate.
- Navigate to Settings > Two-step verification and choose turn off two-step verification.
Make sure you have an approved display name before integrating with your agent, you can read more about it here.
Prerequisites for Registering a WhatsApp Business API Account
Before setting up your WhatsApp Business Platform (API) account, ensure you have the following ready:
- A Phone Number (Physical or Virtual).
- Meta Business Manager (MBM) Account.
Phone Number
You can choose between using your own number or a Meta-provided virtual number:
-
Using your own phone number:
- The number must be valid and capable of receiving SMS or voice calls for OTP verification.
- If the number is currently used with a personal or business WhatsApp app, you must delete the account first. Learn how to migrate an existing WhatsApp number.
- The number must not be from a restricted country.
-
Using a Meta virtual phone number: Meta offers free virtual numbers (starting with 555) during registration. To use one, select "Use a display name only" during the setup process.
- Benefits: No need to purchase a new number, automatic verification (no OTP required), and instant setup.
Meta Business Manager (MBM)
A Meta Business Manager account is required to register for the WhatsApp Business API.
- Ensure your business complies with the WhatsApp Business Messaging Policy.
- You must have Admin access to the MBM account.
- When filling out business information, ensure your location details are accurate.
- Valid Website: Your business website should be accessible, belong to your business, have matching email/web domains, and display your company name or logo. Having a valid website is a best practice to avoid issues during Meta Business Verification.
Meta Developer Portal Setup
To connect WhatsApp, you must first set up a WhatsApp Business account on the Meta for Developers portal.
Create a Meta App
- Go to Meta for Developers and create a new Business app.
- Add the WhatsApp product to your app.
Get Phone Number ID and WABA ID
- Navigate to WhatsApp > API Setup.
- Securely copy your Phone Number ID and WhatsApp Business Account ID.
- Link your phone number and follow the verification steps.
Generate Access Token
- Go to WhatsApp > Configuration.
- Generate a permanent Access Token with
whatsapp_business_messagingandwhatsapp_business_managementpermissions.
Connecting in FahemAI
Once you have your Meta credentials, follow these steps to link your bot:
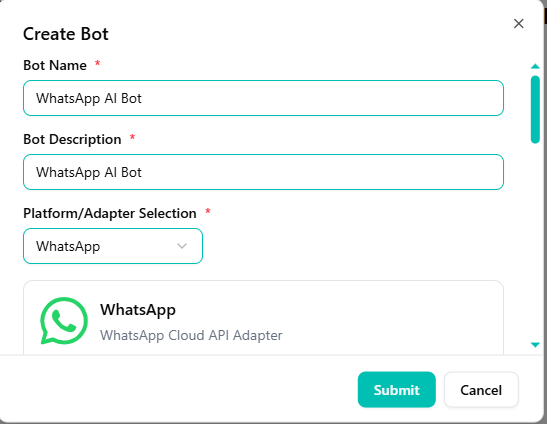
Select WhatsApp Adapter
- Go to your FahemAI dashboard and select your bot.
- Navigate to the Bots section in the sidebar.
- Click the + (Plus) button and select WhatsApp from the dropdown menu.
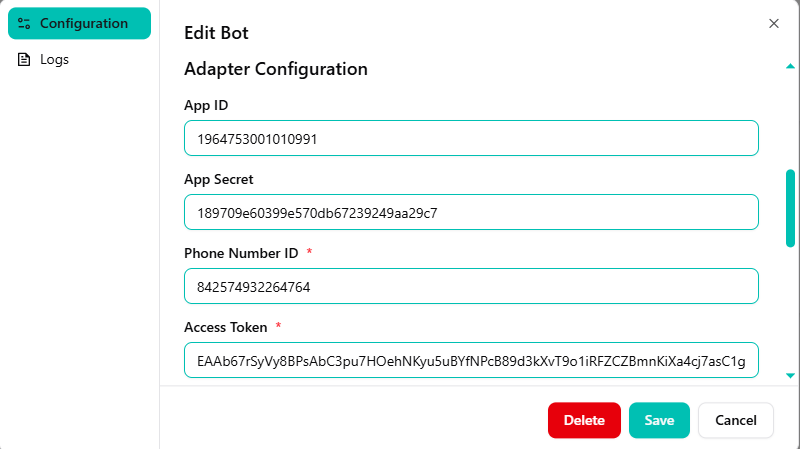
Configure App Credentials
Enter your WhatsApp credentials obtained from the Meta portal:
- Paste your App ID and App Secret.
- Enter the Phone Number ID.
- Paste your Access Token.
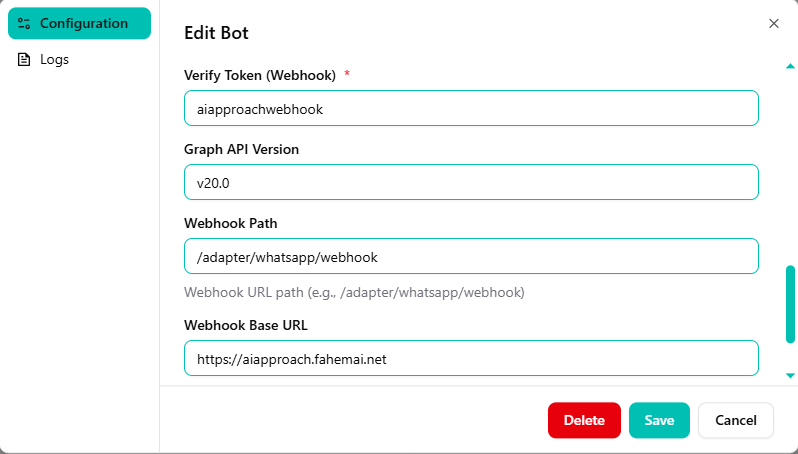
Set Webhook
- Set a Verify Token (e.g.,
aiapproachwebhook). - Choose the Graph API Version.
- Define the Webhook Path (usually
/adapter/whatsapp/webhook). - Set the Webhook Base URL.
Save and Test
- Click Save to activate the integration.
- Now, send a message to your WhatsApp number to test the AI's responses.
Success! Your bot is now live on WhatsApp. It will respond immediately based on your trained knowledge base.
Need help? If you have any questions, feel free to reach out to us.